Automating Microservice API Endpoints Documentation and Validation with Connexion
- 10 minsAutomating Documentation and Validation of API Endpoints with Connexion
There has been an enormous surge of popularity of microservices in commercial products in recent years. As each service can be developed, updated and maintained separately from others it enables teams to have distinct objectives, tasks and responsibilities. This has allowed the scaling of many large companies such as Amazon where new products can just be added with the addition of a new microservice (or cluster of microservices).
This structure comes at a cost, however; as more and more services are integrated, additional complexity is brought to the DevOps, logging and interfacing of the services. Many of these pain points can be nowadays automated with interfacing being no exception. Development teams strongly rely on the documentation from other APIs to understand the requirements, and outputs from other APIs. Therefore, coupling between your documentation and your code is fundamental in providing reliable microservices.
Swagger is one of the most popular standards for API tooling, and is an excellent standard to build microservices off of. To tie validations to the written documentation, Zalando, opensourced a tool called connexion. This tool takes the base swagger.yml (or json) document and automatically builds the correct validations for the incoming payload.
Herein we will create a fully running Flask microservice paired with connexion to allow a completely coupled documentation-validation microservice. The final service can be found on GitHub, here, if you wish to test it out yourself.
Building a Connexion Based Flask Microservice
The best way to get experience with connexion is, building our own Docker microservice! This service will be a basic service with a PUT and GET endpoint which will be specified with our connexion documentation. Having recently moved to Toronto, I’ve been having a hard time keeping up with all the events occuring in the city. Let’s provide an endpoint which we can add future events, and also request them by params.
Specifying Our Microservice With Connexion
Before building a microservice one must first specify what it will provide. In our case we will be creating a simple events service which accepts the event’s name, address and time. Furthermore, on a GET call at the base url of the service, the user can query by parameters, and by specifying the id in the url, the user can obtain specific events.
Let’s create our microservice base document with the swagger API spec inside of it:
$ mkdir events
$ cd events
$ touch apispec.yml
Opening our apispec we can now specify what the endpoint will be providing. These specifications follow the Swagger 2.0 format which can be found here. Lets first declare that we’re creating a Swagger 2.0 design spec with json request responses.
apispec.yml
swagger: '2.0'
info:
  title: Local Events API
  version: "0.1"
consumes:
  - application/json
produces:
  - application/json
Now that we have the specification details set up, we can specify which parameters will be passed in the url, and any payload structures (called definitions) we will be using. In this case, event_id will be our only parameter and Event will be our only payload structure (definition).
[...]
parameters:
  event_id:
    name: event_id
    description: Event's Unique identifier
    in: path
    type: string
    required: true
    pattern: "^[a-zA-Z0-9-]+$"

definitions:
  Event:
    type: object
    required:
      - name
      - venue
      - time
    properties:
      id:
        type: string
        description: Unique identifier
        example: "123"
        readOnly: true
      name:
        type: string
        description: Event's name
        example: "Concert on the Waterfront"
        minLength: 1
        maxLength: 100
      venue:
        type: string
        description: Event's venue
        example: "Roy Thomson Hall"
        minLength: 1
      time:
        type: string
        format: date-time
        description: Event time
        example: "2015-07-07T15:49:51.230+02:00"
      created_time:
        type: string
        format: date-time
        description: Creation time
        example: "2015-07-07T15:49:51.230+02:00"
        readOnly: true
As seen above you can add a number of validation rules for each field, including length, max, mins, regexes and more. Now that we have our parameters and definitions defined, we can declare the different routes that will be used. These will be placed above the parameters and definitions. We’ll add two paths, an /events path where you can retrieve a list of events by params and an /events/{event_id} path for manipulating a single event record.
paths:
  /events:
    get:
      tags: [Events]
      operationId: app.get_events
      summary: Get all events
      parameters:
        - name: name
          in: query
          type: string
        - name: venue
          in: query
          type: string
      responses:
        200:
          description: Return events
          schema:
            type: array
            items:
              $ref: '#/definitions/Event'
  /events/{event_id}:
    get:
      tags: [Events]
      operationId: app.get_event
      summary: Get a single event
      parameters:
        - $ref: '#/parameters/event_id'
      responses:
        200:
          description: Return event
          schema:
            $ref: '#/definitions/Event'
        404:
          description: Event does not exist
    put:
      tags: [Events]
      operationId: app.put_event
      summary: Create or update an event
      parameters:
        - $ref: '#/parameters/event_id'
        - name: event
          in: body
          schema:
            $ref: '#/definitions/Event'
      responses:
        200:
          description: Event updated
        201:
          description: New event created
    delete:
      tags: [Events]
      operationId: app.delete_event
      summary: Remove an event
      parameters:
        - $ref: '#/parameters/event_id'
      responses:
        204:
          description: Event was deleted
        404:
          description: Event does not exist

parameters:
    [...]
With this syntax we can easily see the required payload for each endpoint, as well as the response codes and payloads. Connexion takes this yaml file and passes the specified parameters to the operationId function. Let’s create these functions to handle our logic. We’ll first create our app.py file at the same level as apispec.yml.
$ touch app.py
Now we’re in our python logic we’ll create a basic EVENTS global variable to be used as our “database.” Typically, events would be connected to a database service to store the data.
Below is the logic for the basic get and put endpoints.
import datetime

import connexion
from connexion import NoContent


EVENTS = {}


def get_events(**params):
    """Returns events fulfilling query params"""
    matched events = []
    for event in EVENTS.values():
        if (('name' not in params
                or params['name'] == event['name'])
            and ('venue' not in params
                or params['venue'] == event['venue'])):
            matched_events.append(event)
    return matched_events

def get_event(event_id):
    """Returns event with the requested id"""
    return EVENTS.get(event_id) or ('Not found', 404)


def put_event(event_id, event):
    """Adds or updates an event with a given event id"""
    exists = event_id in EVENTS
    if not exists:
        event['created_time'] = datetime.datetime.utcnow()
    EVENTS[event_id] = event
    return NoContent, (200 if exists else 201)


def delete_event(event_id):
    """Removes event with event_id from EVENTS"""
    exists = EVENTS.pop(event_id, None)
    return NoContent, (204 if exists else 404)


app = connexion.App(__name__)
app.add_api('apispec.yml')


if __name__ == '__main__':
    app.run(host='0.0.0.0')
Your folder should now look like below:
events/
  apispec.yml
  app.py
All we need now is a Dockerfile to build up our instance and a requirements file to install any python dependencies!
$ touch Dockerfile
$ touch requirements.txt
Our Dockerfile will be based off of Docker’s Python 3 image. Here we just need to create a folder for our app, copy our code into it, and install the requirements. Finally, on our docker run command we’ll let the container run the app.py in debug mode.
Dockerfile
FROM python:3.6-alpine

WORKDIR /app

COPY . .
RUN pip3 install -r requirements.txt

ENTRYPOINT ["python"]
CMD ["app.py"]
We can add our python package requirements for the project in the requirements.txt file.
requirements.txt
connexion==1.3
We can now build and run our events container. Make sure to open up port 5000 to access it on your host machine
From event parent folder
$ docker build event
$ docker run -p 5000:5000 event
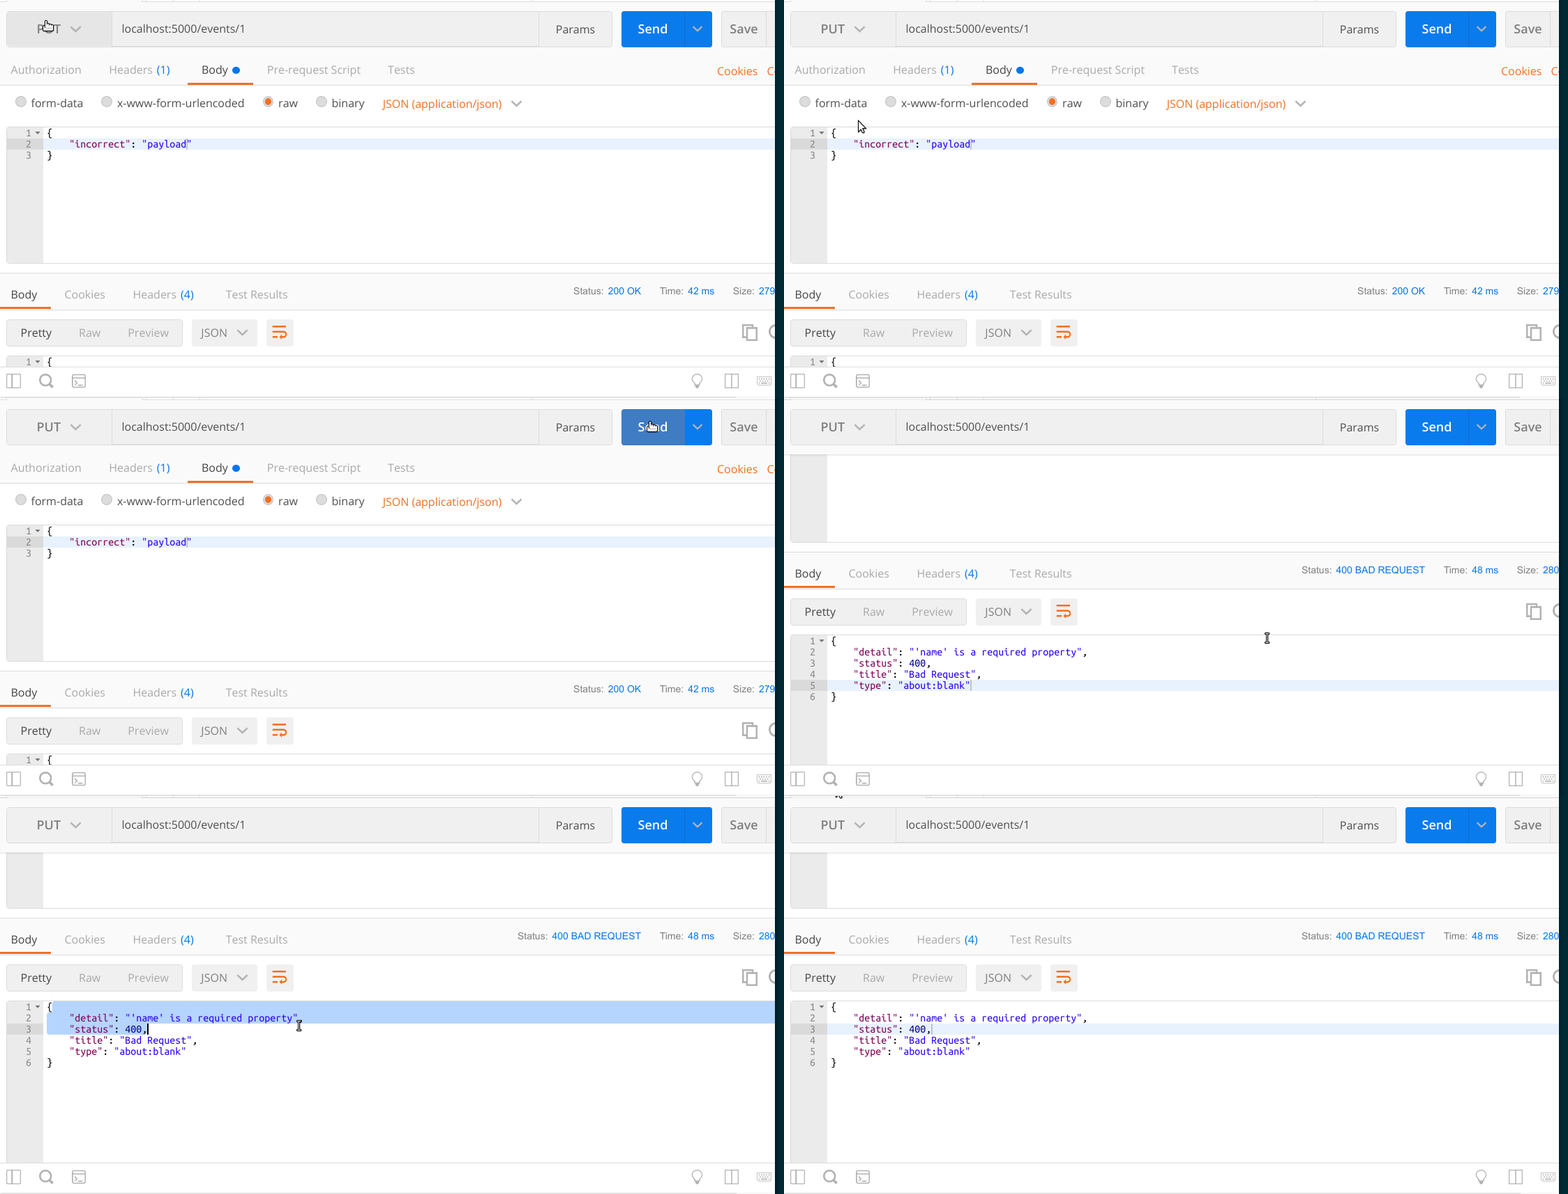
That’s it! You should now be able to access the endpoints on your local machine at port 5000. As connexion checks our payload based on the documentation we should receive an error if an incorrect payload structure is sent.
Incorrect PUT Request to localhost:5000/event/1 
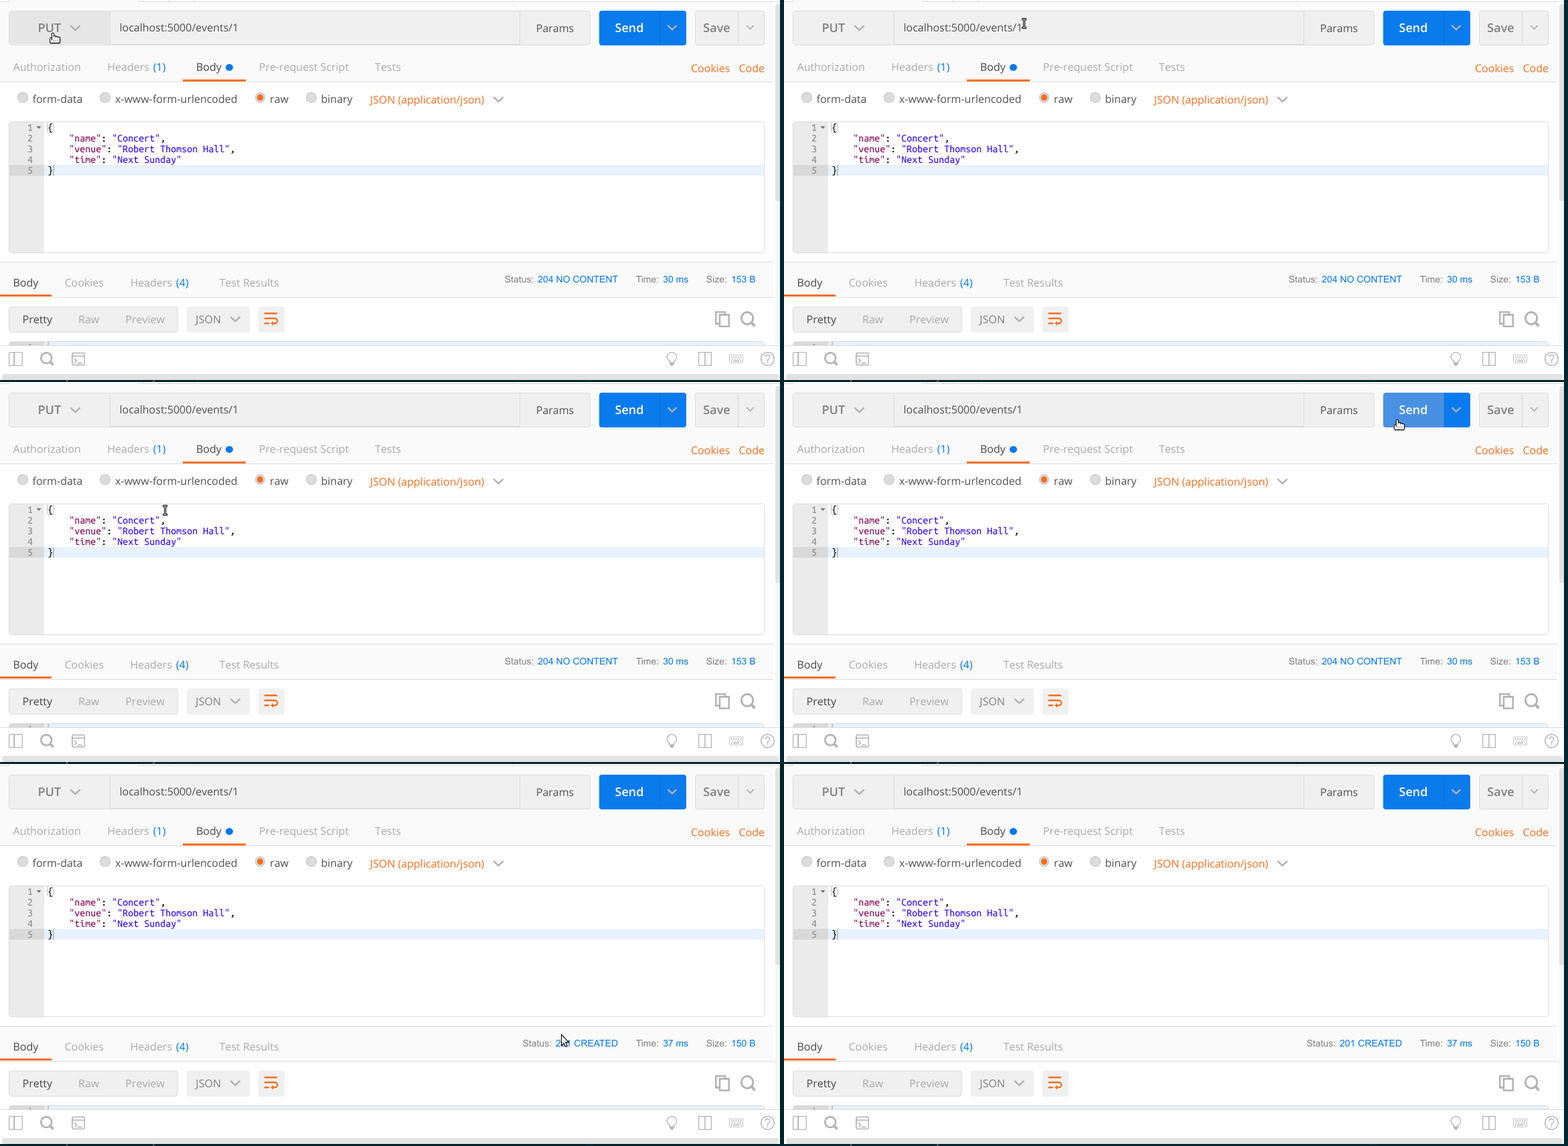
Here’s an example of a PUT request with Postman.
PUT Request to localhost:5000/event/1 
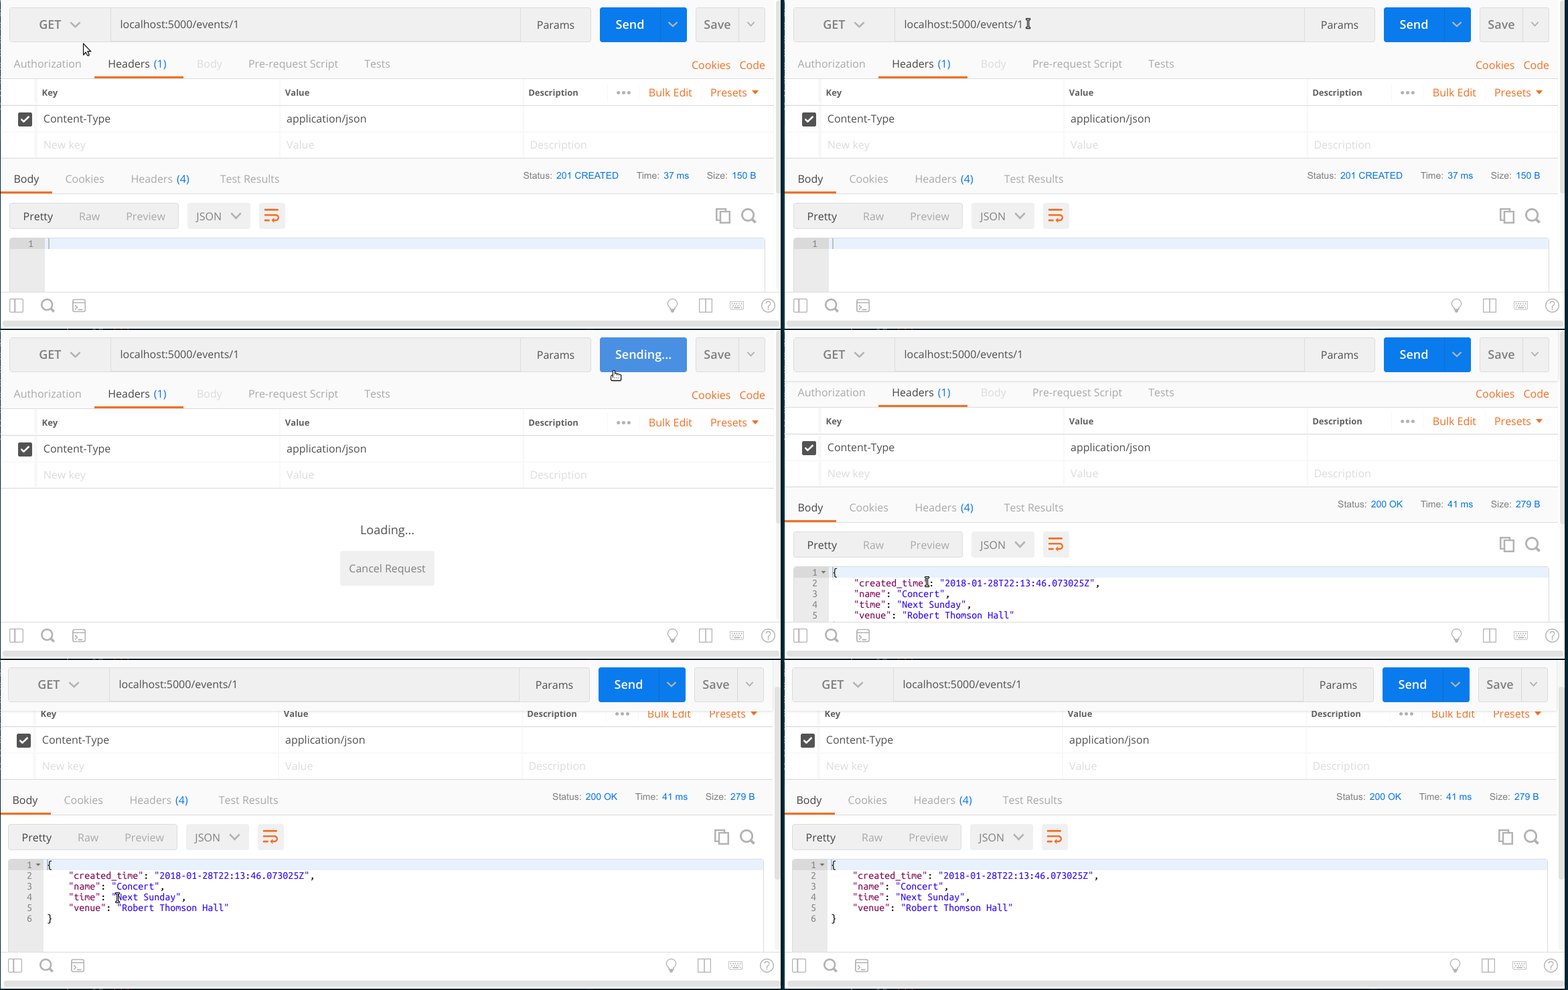
Now we can retrieve our payload from the same URL!
GET Request from localhost:5000/event/1 
That’s it! Now we have our API payload validations based off of our documentation. With this set up you can be assured that what you see in the documentation is what you will get from the endpoint.
